|
Tutorial
1: Extraction and Conversion of Gene Sequence
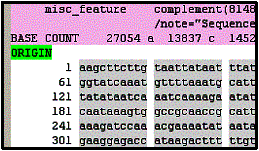
We will first be selecting the nucleotide sequence located
at the bottom of the Arabidopsis File. Right click on 'ORIGIN' located
in field 0, line 626 and select New Block Open Condition from
the pull down menu. A green highlighted box will appear.
Note:
Your cursor position is shown in the lower left hand corner of the program
window. The line numbers are located on the left-hand panel.
Scroll
down to the bottom and right click on '//', choose New Block Close Condition from the pull down menu. A red highlighted box will appear.
Left
click on the first column containing the nucleotide sequence. This will highlight the entire column grey, meaning it is selected. Then left click on the second column, then the third column, and so forth until you have selected all six of them. You are
making a column selection and fields one through six should be highlighted
in grey. The figure above shows the final appearance of the nucleotide
sequence selections.
Select
'Move' from the icon panel and give your rule a descriptive name. This
moves the data that you have selected to the 'Convert Data' panel where
rule-dependent rules can be incorporated for better data extraction. (Rules are just a bunch of conditions you set so that you can extract data)
Select
'Insert' from the icon panel and select the Concatenation Rule. Give
your rule a descriptive name.
Note:
Any rule that is in red text means the rule is not defined. To define
a rule select the '????' box and define the rule.
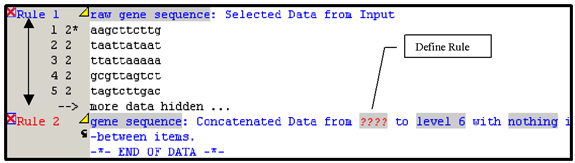
Click on the '????', choose
'Rule 1' to make use of the data you obtained from the genbank data you just moved.. Since the data is at a level
2 (shown by the number next to the star, under Rule 1) change the level 6 to
a level 2. (Click on level 6 and a menu should appear)Leave the last option as 'nothing in-between.' You may wish to 'Wrap' your data
at this time to view the complete sequence. The 'Wrap' and 'UnWrap' icons are located in the icon panel.
The Rule 2 sentence should now read: Concatenated Data from Rule1: nameofyourrule to level 6 with nothing in between.
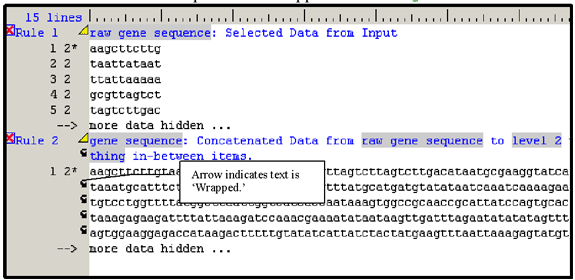
Note:
The yellow arrows in the corner of the above figure can be expanded
or collapsed depending on the view desired of the data set by clicking
on them.
Your
final 'Convert Data' panel should appear as follows;
Select Rule 2 ( the concatenated sequence, when you select it, the letters Rule 2 will be highlighted in light grey), then Select
the 'Copy' button from the icon panel to move your data to the 'Output
Data'. In the 'Output
Panel' users can add any text format to the data set and view the changes
by selecting the 'Output' icon in the icon panel.
The tag should
not be modified but can be moved around. If users wish
to limit the output to a set number of lines, the tag may be
edited by including a ':width' before the closing bracket (>). This
restricts the body from flowing past the specified width. Example: <gene
sequence:60>.
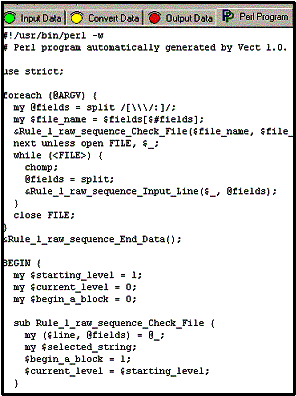
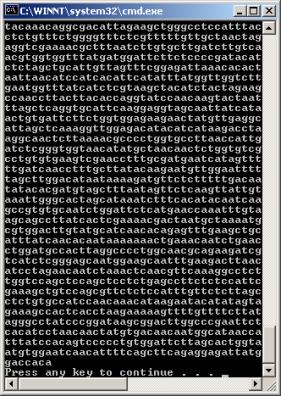
To
show the Perl code, move to the 'Perl Program' panel and select 'Compile.'
Your Perl program appears as shown below. To run the program generated,
select the 'Run' icon. A new window will appear with the results of
your Perl program.


|