|
Part I <Selecting Data > (continued)
Now, the area that you want to select is defined. The Block Restriction -- New Block Open Condition and New Block Close Condition-- was just used to define the selected data from the whole data set, so you still have to select the data by using field selection* or column selection**.
* Vect arranges the data into fields based on word orientation. It begins from the left most column, which is called field 0. Field selection is just clicking the field, then the whole field will be selected and will be highlighted in gray. The gray highlighted regions will be transferred to the Convert Data panel for further manipulation.
** Column selection is clicking and dragging over the area you want to select. The whole selected column will be highlighted in gray.
6. Click “Design” (or other types of patents on the left most column-- applying field selection). Only Field 0 between the green and red blocks will be selected and will be highlighted in gray. Which means that those gray highlighted region will be transferred to the Convert Data panel.
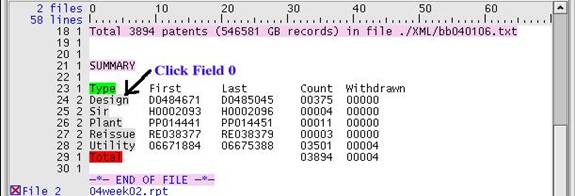
(CHECK: Go over the whole input data file to make sure that only the text that you desired is being selected.)
7. Click the Move button from the icon panel

and name this data “Types” (or something that makes sense to you).
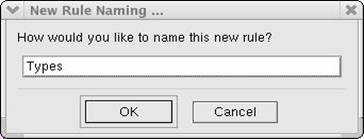
The Move button will transfer the selected data to the Convert Data panel.
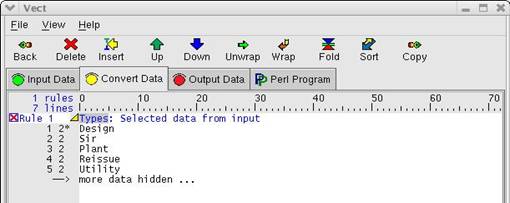
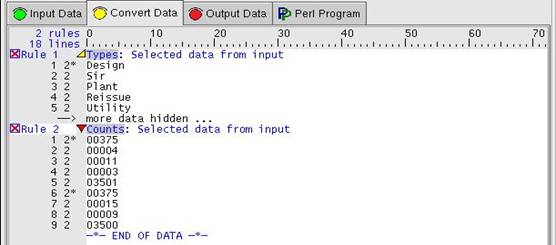
The Convert Data panel is where you can manipulate the data by inserting rules. Now, the types of patents are selected. You can see the whole data by clicking the triangle next to “Types.”

(“*” (circled in green) is a sign of the beginning of files. Because you load two files, there are two “*” on the screen.)
You also have to transfer the “Count” numbers from the Input Data panel to calculate the total number of each patent.
8. Go back to the Input Data panel and repeat steps 3 through 5. (Define the beginning and ending area and apply Exclusive Selection on the green and red blocks.) Then, click on any numbers on“Count” column (Field 3). It should appear as shown below:
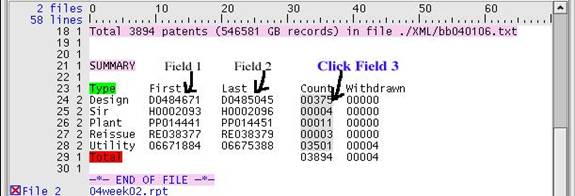
9. Click the Move button and name it “Counts” (or something that makes sense to you). The numbers from the “Count” column will appear on the Convert Data panel.
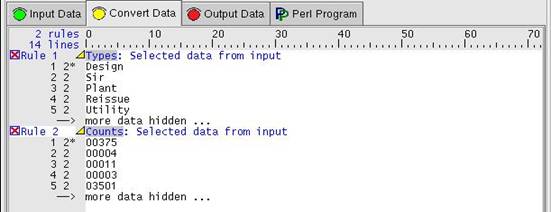
You can see the whole data by clicking the triangle next to "Counts"!
 
|