1. Windows in TREND
Before you begin, it is important to understand the tools you will use while
working with TREND. After starting the TREND application, three main screens
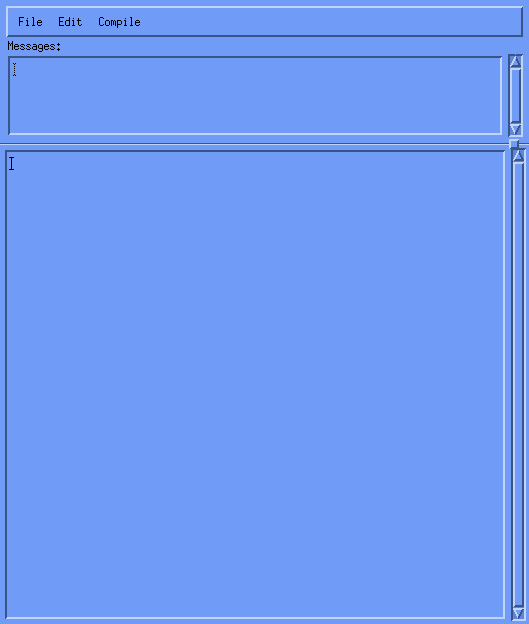
will appear layered on top of each other. The initial screen that appears on top
is the .RULE screen.
| Below is the .RULE screen. |
 |
| Click and drag the .RULE screen to a side so the .CA screen is visible. |
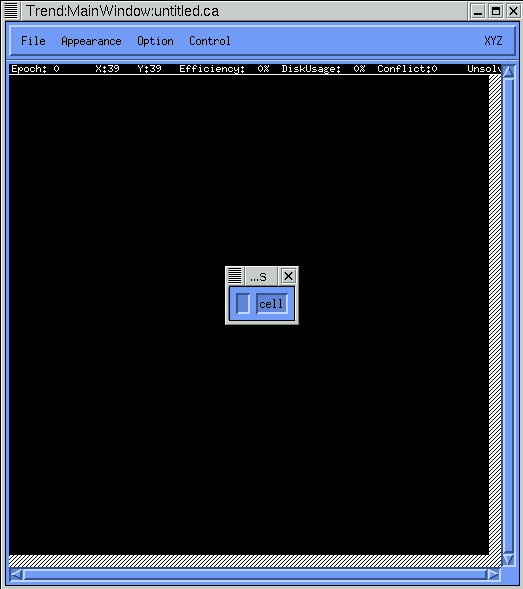
| Below is the .CA screen. |
 |
Within the .CA screen is another smaller screen that shows the current fields. The default is one field called CELL. This will be discussed more later. For now click and drag the small screen to a free area on the desktop so it is not on top of the .CA screen.

Arranging the screens is similar to most applications. The option of resizing the screens is available by moving the mouse to the border of the individual screens and dragging the borders until the size desired. For now arrange the three separate screens so they all are visible on the desktop.
When starting a new project, there is the option of changing the default for the fields. As noted earlier, the default for the initial field called CELL is one bit that can hold 2 state symbols. Select the File option on the CA screen and select Modify template... The screen will appear as it does below.

For now just click Cancel and return to the initial CA screen
2. Controls in TREND
TREND works with cells. Each cell is separate and the code has the ability to affect each cell separately. That is the idea of Cellular Automata. For that reason, TREND uses a CA space. It is a screen that is broken up into cells, or a kind of grid. Each location on the grid is a cell. Symbols can be used to create a unique CA space, or to recreate an existing CA space. In the example below (click on the figure to see a larger one), the shape for The Game of Life is loaded into the CA space.

The shape can be modified by the user by using the right-mouse click to select or unselect a particular symbol for a specific cell location on the CA space. This is done by selecting the field you wish to add to the CA space. In the example above, there is only one field (Cell) defined. The user is able to alter the CA space by right-click the mouse and select a symbol defined for that field. With the Game of Life project loaded in the CA space, move the mouse pointer to anywhere inside the CA space that does not already have a symbol showing and do a right-mouse click. Select the o symbol from the listing of symbols that appear. A new symbol should be added to the CA space. If the rule is again compiled with the new symbol, the symbol will be included and acted upon by the rule. To delete a symbol from the CA space, simply point to the symbol and do a right-click. Select the dot (.) from the list. This will remove the symbol from the CA space. Again, compiling the rule is necessary after altering the CA space.
TREND allows the user to control the compiled rule step by step. With a set of controls, the user can control the epoch of the CA space. The epoch is like the number of cycles, or the number of times the rule has been applied to the shape in the CA space. The epoch number is shown in the upper-left hand corner of the CA space, just below the menu bar. Epoch 0 is the starting point.
To advance the epoch, the user has the option of the on-screen controls or the keyboard controls. To use the on-screen controls, select Control from the CA screen menu. The box below will appear.

To have this option on the screen at all times, select the Controls option again and then click the dotted line. This will allow you to "tear off" the Controls box and move it to a open portion of the desktop for later use. The function of the buttons are shown in the chart below. If the user prefers to use the keyboard to control the rule, the corresponding arrow buttons are shown as well.
| button
| action |
keyboard |
| -> |
forward |
right-arrow |
| ->> |
fast forward |
up-arrow |
| stop |
stop |
spacebar |
| <- |
back |
left-arrow |
| <<- |
rewind |
down-arrow |
One last important note on use of the controls. It is a "good idea" to return the epoch number back to zero before making any changes in the rule. This will allow the original shape to be tested by the changes in the rule after compiling. So a "rule of thumb" to follow is to rewind the CA space each time before making any changes.
3. Rule Compiling in TREND
When using TREND, the code must be compiled before the rule can be run. This is the case on a rule just written, or an existing rule that has been loaded from memory. Because you can use a particular rule with an infinite number of CA space configurations, the rule must be compiled with relation to a particular CA space and .tmpl that has been chosen/created for this rule to be executed with.

At the top of the coding screen is an option labeled Compile. Select this option and select Now. The compiler will attempt to compile the code in the .rule screen below. If it is successful, it will appear as the example does below.

As with most languages, any changes that have been saved in the coding screen must be compiled again in order to be recognized. All rules provided by the downloaded version of TREND will compile with no errors if used as they are provided.
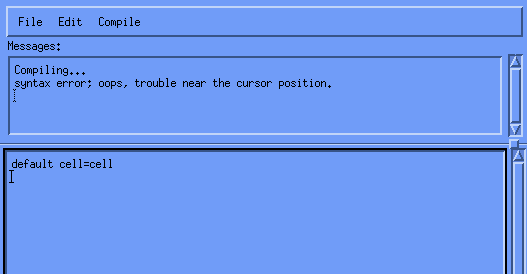
In the example below, the code has a simple error.

In the only line of the code, the semicolon is missing to signify the end of the line. When compiled, an error message is provided and the cursor will move to the general location of the error. In this case, there is only one line, but the cursor moves to the end of that line to signify where the problem may be. Forgetting the semicolon is a common error in TREND as it is in C++.
back to top
|